Microsoft Visual Basic 6.0 help - Creating an OCX

Creating a Count Down Timer OCX for Visual Basic 6.0


vby6 home

Visual Basic 6.0

Steps to create a count down timer OCX In Visual Basic 6.0

Introduction

Creating a count down timer can be tricky even for an advanced programmer, the idea of a counter is almost the same except we count down in this case, counting up as a default counter relies on adding (1) to the value of an integer variable in a timer tool, and the best example for this is the (Clock / Timer) where you put:

Label1.Caption = Now

in a timer control whose interval is (1000 ms) and finaly in (Form_Load) event you triger the (Timer1_Timer) event by setting its (Enabled) value = (True).

Logic

In our example (The Count Down Timer) we don't just inverse the previous process, we create a new method as shown in the source code. The idea of a count down timer is : variable integer = value minus (-1, -2, -3, ......) another integer variable in a timer i.e. (Sec) integer variable = 10, 10 is start of the down-counter, in the timer event (Sec = Sec - 1), but if we finished at this point, we won't get anything, the result will be infinite , and here lies the trick, we must do checking for sec's value (if = 0 then exit sub or anything) then label1.Caption = Sec, only then we will see a count down to (0).

Here is the source code for the example above, try to enhance it the way you like by adding some codes in the Sub Reset().
Source Code at MediaFire.com

Creating the *.ocx file

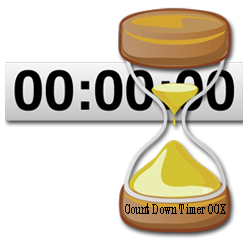
As an extension to this Count Donw Timer i developed a CountDownTimer.OCX file to be used on Visual Basic 6.0 Projects.The Ocx is deployed and ready to setup and also deployed in Source Code uploaded at MediaFire.com Link.

If you choosed to download the deployed OCX to use in your projects, note that it is valid to use until the end of year 2013, but of course you can always download the source code and edit it to be valid for a lifetime.

If you choosed to use the ActiveX Control (OCX) in your projects, please read the How Tos below .

How To Work with Count Down Timer.Ocx

After download the deplayed copy from MediaFire.com, extract the .rar file anywhere.

Find the SetUp.exe file and double-Click on it, and continue with setup.

After the setup is finished, the path to the OCX must be in your C:\Program Files\CountDownTimer.

Find CountDownTimer.ocx file and copy it to C:\Windows\System32.

Open your Visual Basic 6.0 project and click (Ctrl+T) for components and click Browse, find C:\Windows\System32\CountDownTimer.Ocx and click OK, it will be displayed among your other OCX files, mark it and click ok.

It will be added to your VB 6.0 Toolbar, in case of not registered message popped up, use the CMD command from Run and type (regsvr32.exe CountDownTimer.ocx) and OK, it will be regisitered.... this is how you register all unregistered ocx files.

Place (Drag and Drop) the CountDownTimer.ocx from toolbar to the form.

Code Highlights

Private sub Form_Load()

CountDnTmr1.Speeding = NormalCountDnTmr1.Trigger 10
Command1.Caption = ("Visibilty Is : " & CountDnTmr1.IsShown)

End Sub

Speeding : Sets the counting speed, there are 3 levels (Fast, Normal, Slow). The fast is (3counts/Sec), the Normal (1count/sec), the slow is (1count/3secs)

Trigger : Sets the start counting number. if you specify number (10) then counting will start from 10 until reaches 0 then it stops.
You can create events depend on it.

IsShown : If set to true the the count down timer will be visible, otherwise it won't be

The event (IsCounting) : Double click on the CountDownTimer, in the IsCounting Event, place thise code -

    If CountDnTmr1.Cnt_Donw_Sec = 0 Then
    Me.WindowState = vbMaximized
This code will cause the form to be Maximized when the counting reaches 0, you can modify it to triger events when the counting reaches any number.

Place a Command1 on the form, and in the Click Event, place this code :

    CountDnTmr1.IsShown = Not CountDnTmr1.IsShown
    Command1.Caption = ("Visibilty Is : " & CountDnTmr1.IsShown
While the counting down is on you may choose to hide it or show it using the IsShown built-in Property.
It is really simple and helpful to use and to develop also, it's a good free material to start your own OCX developing, so Good Luck.

Labels :

Visual Basic, learning visual basic, visual basic training, visual basic for dummies, learn visual basic 2010, visual basic classes, visual basic coding, learn visual basic programming, learn visual basic online, visual basic programmer, visual basic help, help with visual basic, visual basic programming help, visual basic 2010 help, microsoft visual basic help, microsoft visual basic 6.0 help, vb programmers, Visual Basic 6.0, visual basic 6.0 software, visual basic 6.0 training, learn visual basic 6.0, ms visual basic 6.0, visual basic 6.0 pro, visual basic 6.0 learning edition, software of visual basic 6.0, how to learn visual basic 6.0, learning visual basic 6.0, visual basic 6.0 price, Create VB 6.0 OCX, OCX, Visual Basic 6.0 ActiveX control

About Us | Contact Us | ©2013 evry1falls


Free Web Hosting